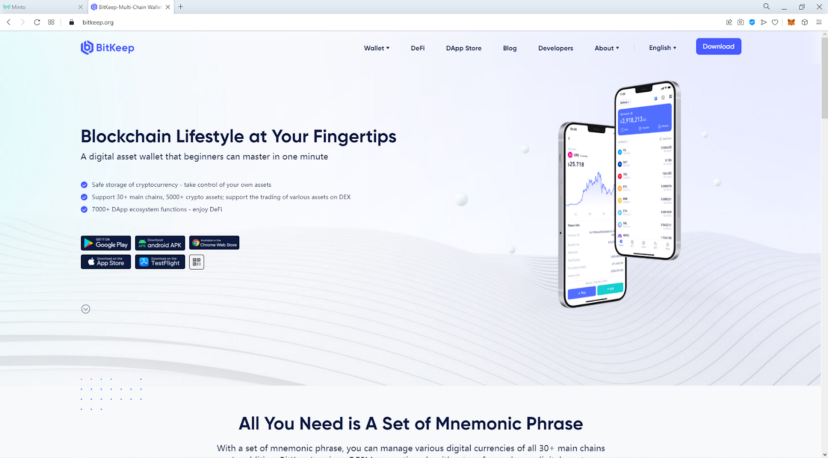
BitKeep (Bitget Wallet) is a decentralized multi-chain digital wallet, dedicated to providing safe and convenient one-stop digital asset management services to users around the entire world. Currently, there are nearly 5.000.000 users covering 150+ countries. BitKeep has reached ecosystem and strategic partnerships with Top 30 public blockchains like ETH (Ethereum), HECO (Huobi Eco Chain), BSC (Binance Smart Chain), TRON, Polygon, Solana, Fantom, Wax, IOST, AVAX, OEC etc. and become the official recommended wallet.
💎You may utilize Bitkeep, MetaMask or any other wallet supported by Minto. This guide is dedicated to BitKeep which is rather convenient and functional for getting bitcoins from Minto in Huobi ECO Chain, converting or transferring your assets as needed.
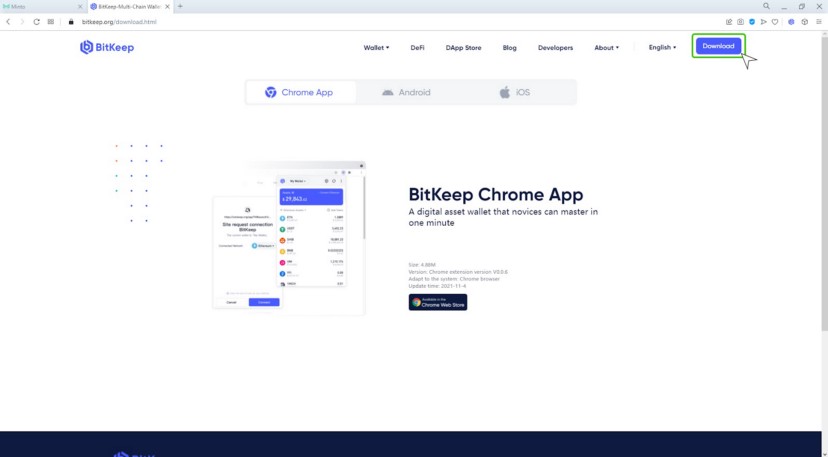
2. Click <Download> and choose the Android, iOS or desktop version from Google App Store of the wallet. Click the choosing icon or scan the QR-code.
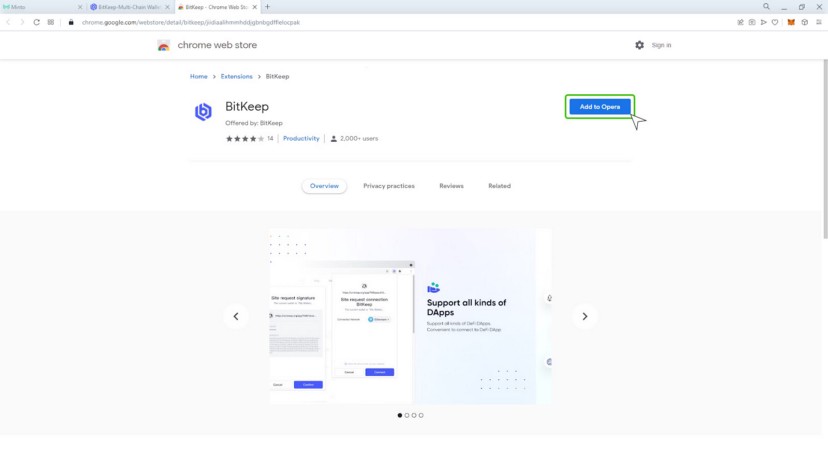
3. For the desktop version click Add to a browser (Chrome, Opera, FireFox) and the BitKeep icon appears in the Extensions panel of your browser.
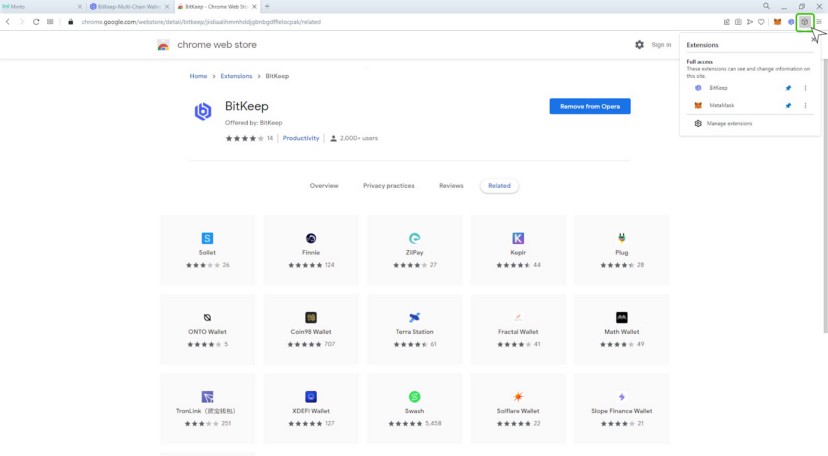
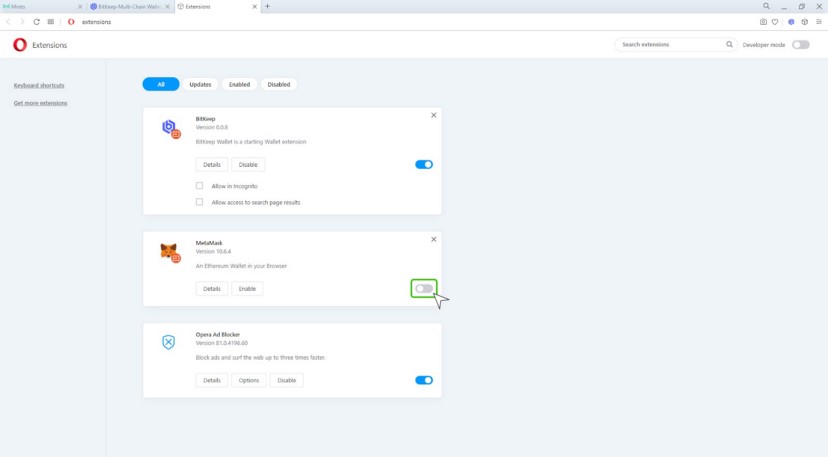
4. Click the icon of the Extensions panel in the upper right corner of the screen to see your extensions and BitKeep as well. Pin the wallet to the panel by clicking the pushpin. If you have utilized the MetaMask wallet before you should switch it off. Click <Manage extensions>.
5. Switch your MetaMask off by clicking the switcher.
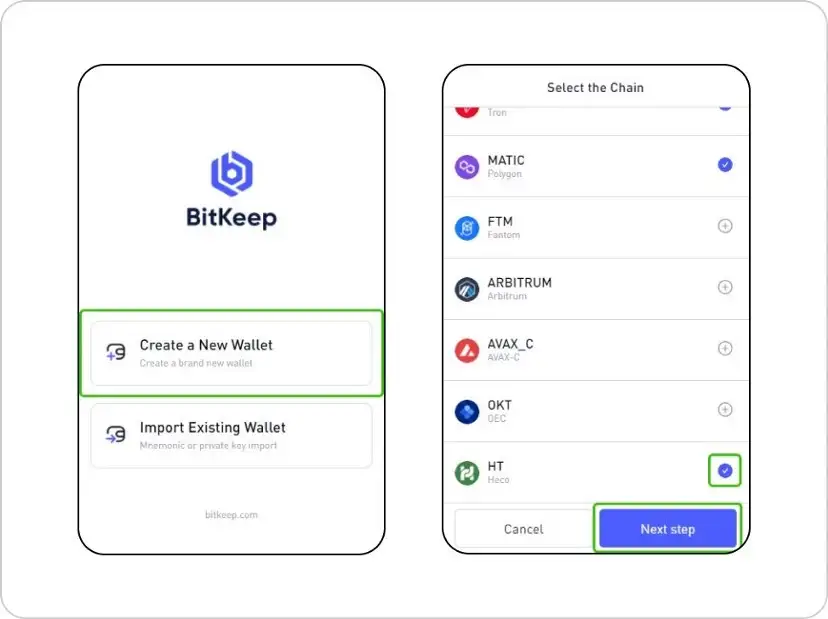
6. Click the BitKeep icon on the Extensions panel. You may import your existing wallet or create a new one.

7. Click <Create a new Wallet> and scroll the blockchain list in order to make sure that the HECO network is selected. If not, check the box next to it. Click <Next step>.
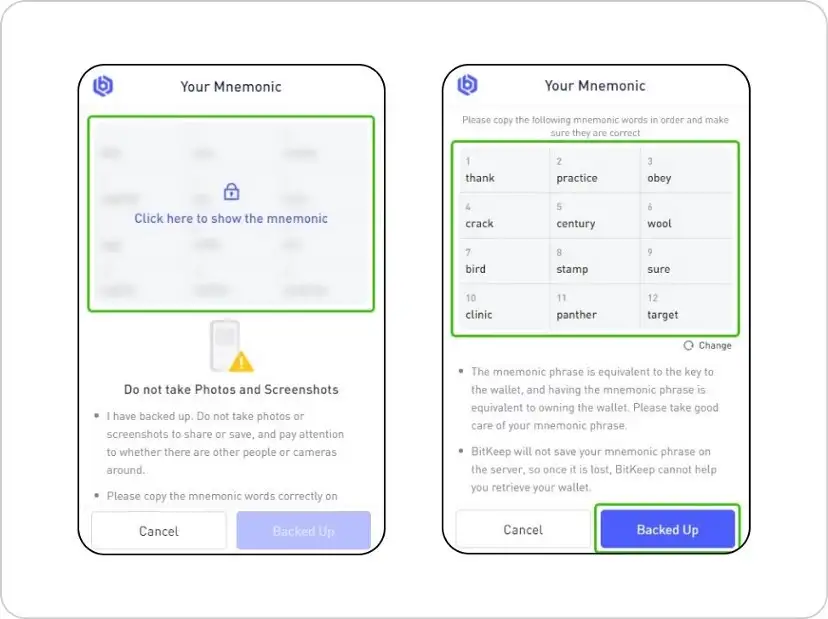
8. Click to show the mnemonic as it says in the pic and then write down a 12-word seed phrase. Do not take photos and screenshots, and pay attention to whether there are other people or cameras around. Save this phrase in a safe place. With the help of the seed phrase, you can restore your wallet or import it to another device (as offered in one of the previous pics). No one should have access to this phrase, because otherwise you will most likely lose your funds. Click <Backed Up>.
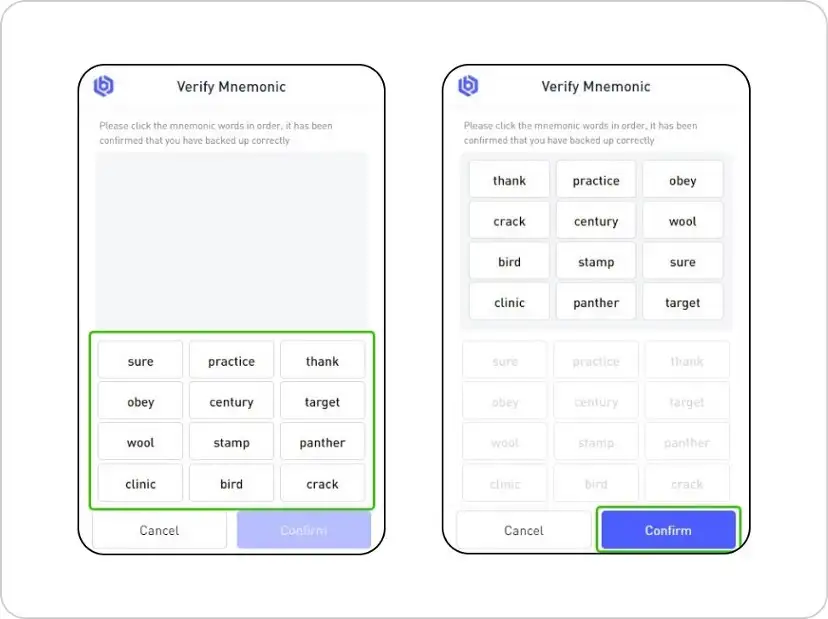
9. To check yourself click the mnemonic words in order, it has been confirmed that you have backed up correctly. Click <Confirm>.
10. Enter a password, at least 8 digits, including letters and numbers, and repeat it to check yourself. This password will be requested every time you log in to the wallet. Don’t forget this password! Click <Confirm>

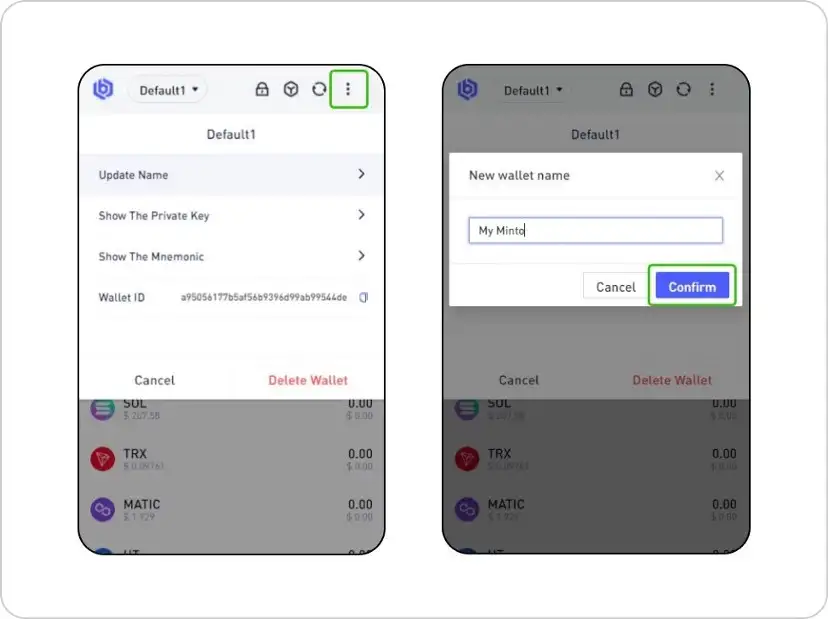
11. Your wallet has been successfully created. Now you can configure it for further work. Click the three dots in the upper right corner of the screen to open the settings menu.

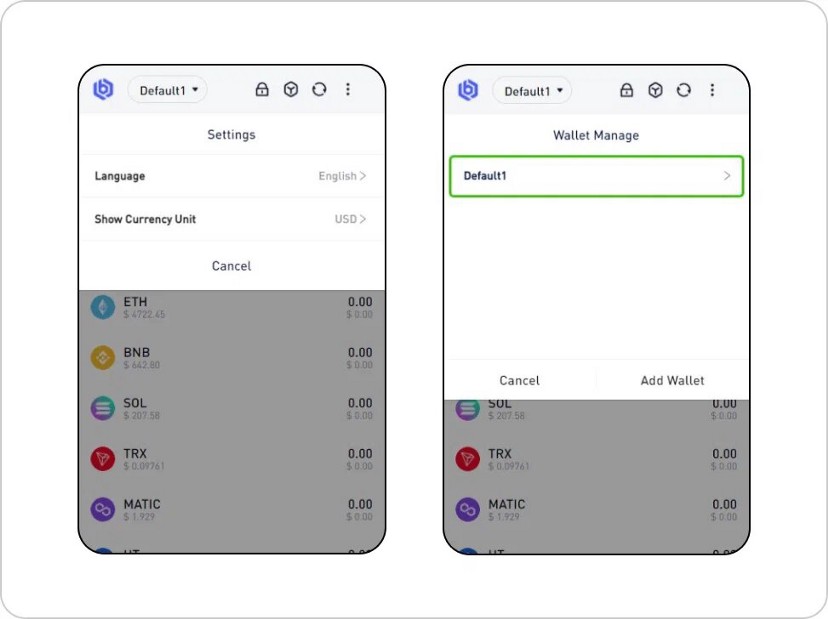
12. Clicking <Settings> you may configure the language and base currency to display the value of assets. Clicking <Wallet Manage> you may update the name of the wallet, get information about seed phrase and private key which is the same phrase in encrypted form, if necessary, and even delete a chosen wallet. You have only one wallet by default but you can create several ones later by clicking <Add Wallet>. But for now, we’ll configure an existing one. Click <Default1>.
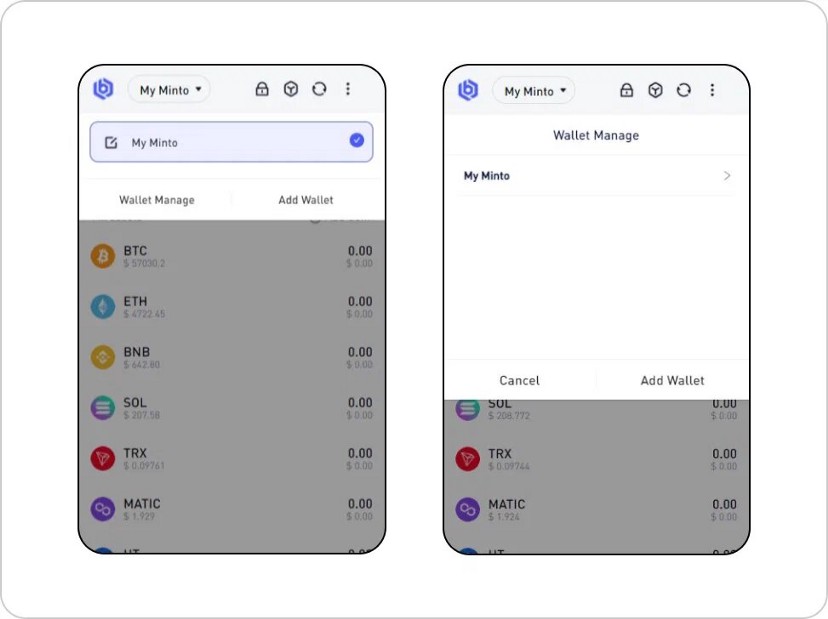
13. Click <Update Name> and enter a new name for your wallet, for example <My Minto>. Click <Confirm>.
14. Click the three dots in the upper right corner of the screen to return.
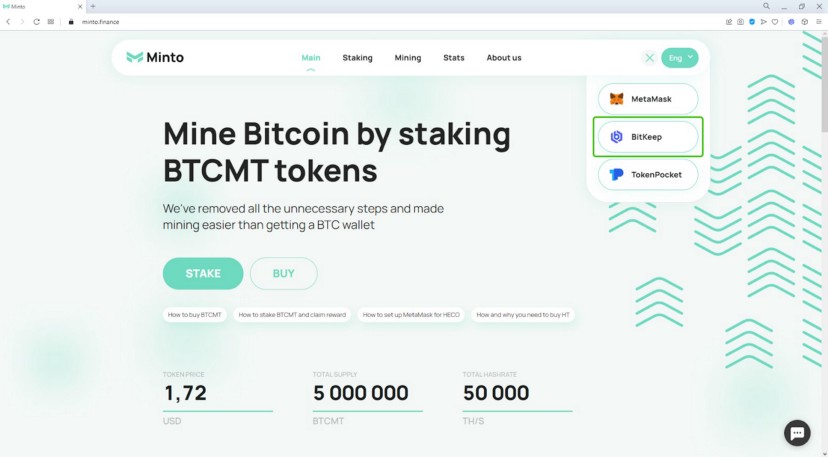
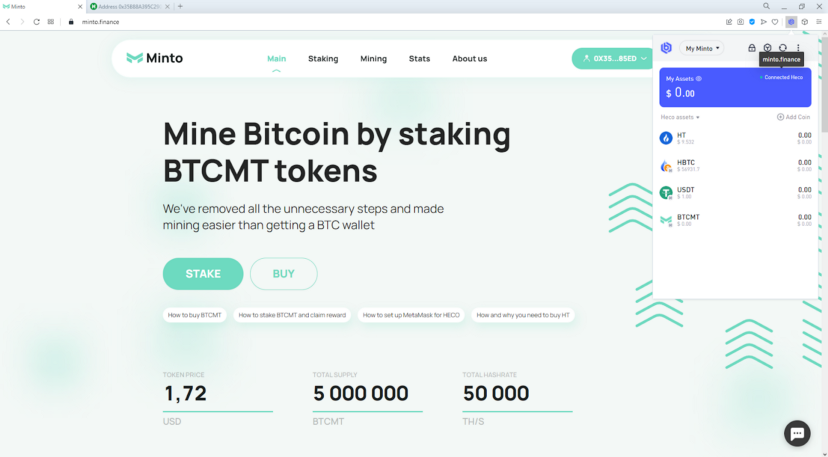
Your wallet is ready to connect to the Minto website.
15. Open the Minto website https://minto.finance/ and click <Connect wallet>.
Choose the BitKeep wallet and click it.
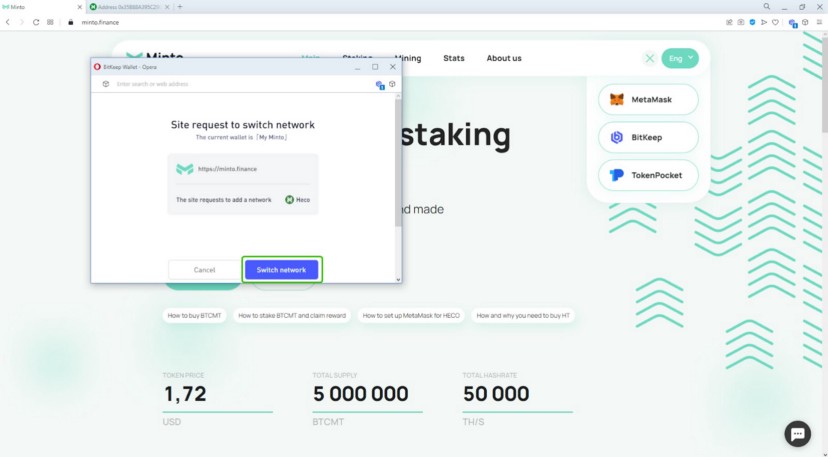
16. Confirm the site’s request to switch the network by clicking <Switch network>.
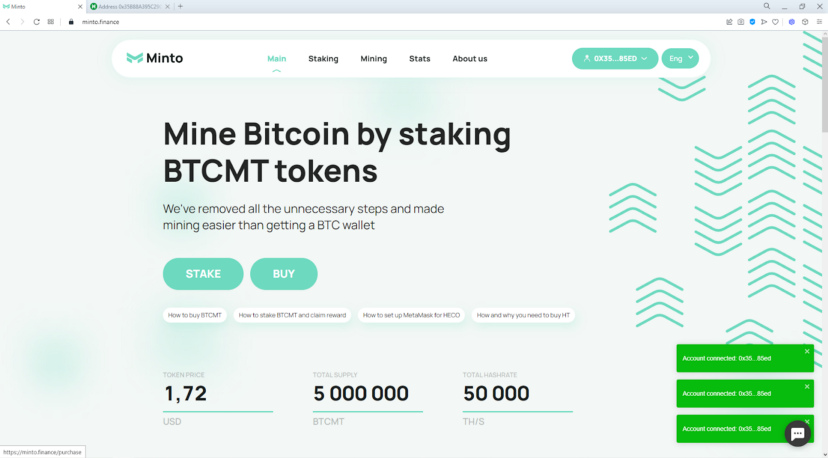
17. Pay attention to the appearance of your wallet address in the field where it was written “Connect wallet”, as well as the pop-up window “Account connected” with the same address.
18. Click the BitKeep icon in the extensions panel of your browser in the upper right corner of the screen.

19. Now we will add all the coins we need to the wallet. Click <Add Coin> and enter “hbtc” in the <Search> field.
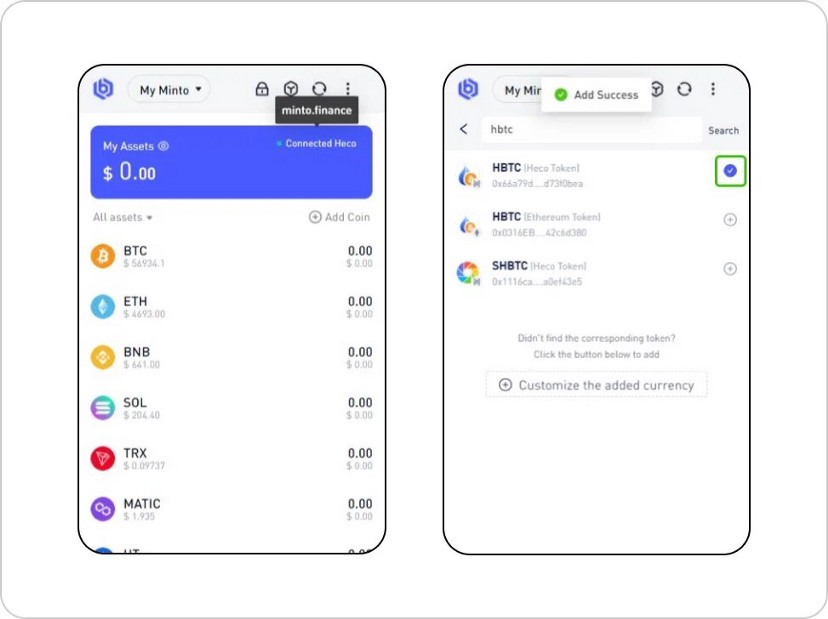
20. Choose HBTC (Heco Token) with the address “0x66a79d23e58475d2738179ca52cd0b41d73f0bea” by clicking its checkbox. Afterwards enter the next coin “usdt” in the <Search> field and choose USDT (Heco Token) with the address “0xa71edc38d189767582c38a3145b5873052c3e47a” by clicking its checkbox as well.

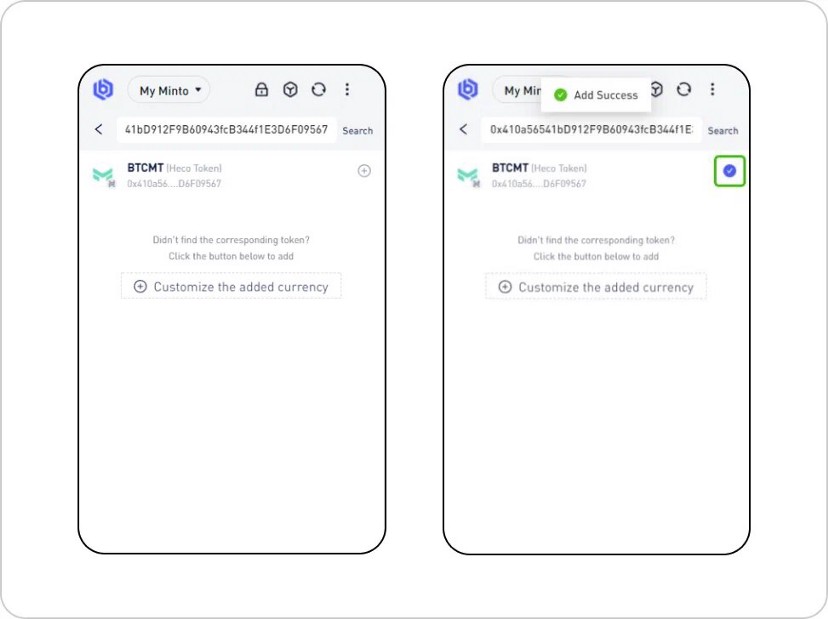
21. Here, in the <Search> field enter the address of the BTCMT token “0x410a56541bD912F9B60943fcB344f1E3D6F09567” and confirm it by clicking its checkbox.
Click the arrow to the left of the <Search> field to return.
22. If you are currently planning to work only on the HECO network, you can remove all unnecessary coins from your wallet for greater convenience. Click <All assets> and in the drop-down list, select only “Heco Chain assets” by clicking its checkbox.
23. Finally you will see your 3 added coins and HT (Huobi Token) for payment of transaction fees.
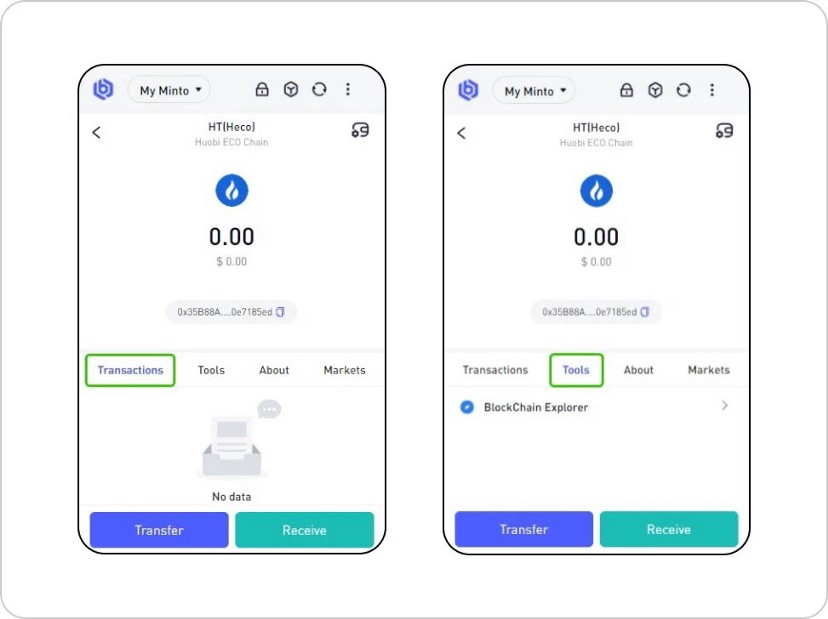
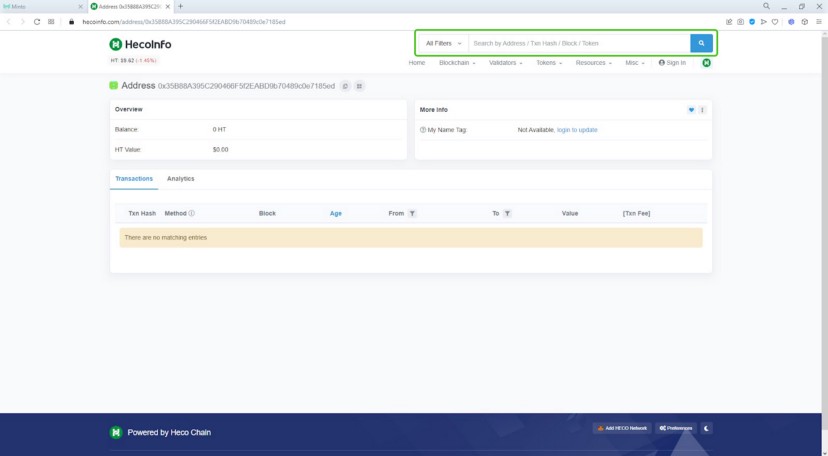
24. Now your wallet is completely ready for use. It remains to make sure that it is very simple. Click any coin, for example, HT. The <Transactions> tab will list all transactions with this token. Using the <Tools> tab, you can get into the <BlockChain Explorer>, where all the information about this token in your wallet is collected directly in the browser. Click <BlockChain Explorer> to look and maybe explore it.
25. Here you may see the HT address of your wallet, your balance and other information. You can also find other tokens of your wallet using the search bar.
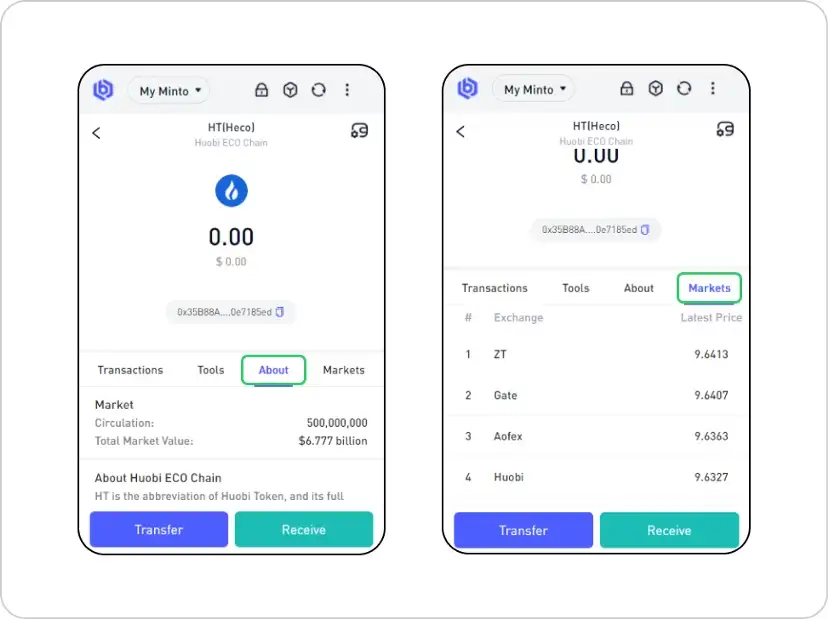
26. But let’s go back to your wallet. On the <About> tab, you can get detailed information about the token, its circulation, total market value, and others. The “Market” tab contains the token exchange rate offered on various exchanges.
27. In order to get a token to your wallet from the exchange or from another wallet, click <Receive> and then scan the QR code or copy the address by clicking the “copy” icon.
To send the token to another address, click <Transfer>, enter the required address in the <Receiver’s Address> field, enter the amount to be transferred in the <Number of Transfers> field. Sometimes the recipient requires you to fill in the <Memo> field, please note if required, otherwise, leave this field blank. Check everything again and click <Confirm>.
NB! Remember that any error when entering the address will entail an imminent loss of funds!
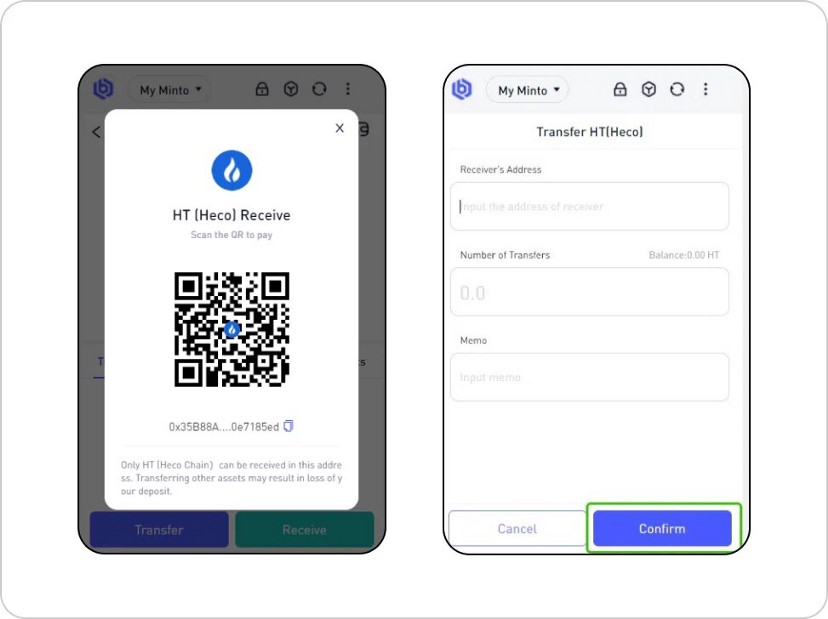
Remember that if your wallet works on the HECO network, the HECO network must also be specified on the sender’s and recipient’s sides!
Congratulations! You’ve come a long way, but it was worth it!